
Welcome to AiO Podcast Studio, your complete WordPress solution for creating, importing, managing, and displaying podcasts from one powerful platform. This guide walks you through every step in a simple, beginner-friendly way — whether you are importing an existing show or launching a brand-new one.
Contents
- Step 1: Install AiO Podcast Studio
- Step 2: Import an Existing Podcast via RSS (Optional)
- Step 3: Create a New Podcast from Scratch
- Step 4: Add Episodes to Your Podcast
- Step 5: Display Podcasts and Episodes on Your Website
- Helpful References
Step 1: Install AiO Podcast Studio
The first step is installing the plugin on your WordPress website.
How to install the plugin:
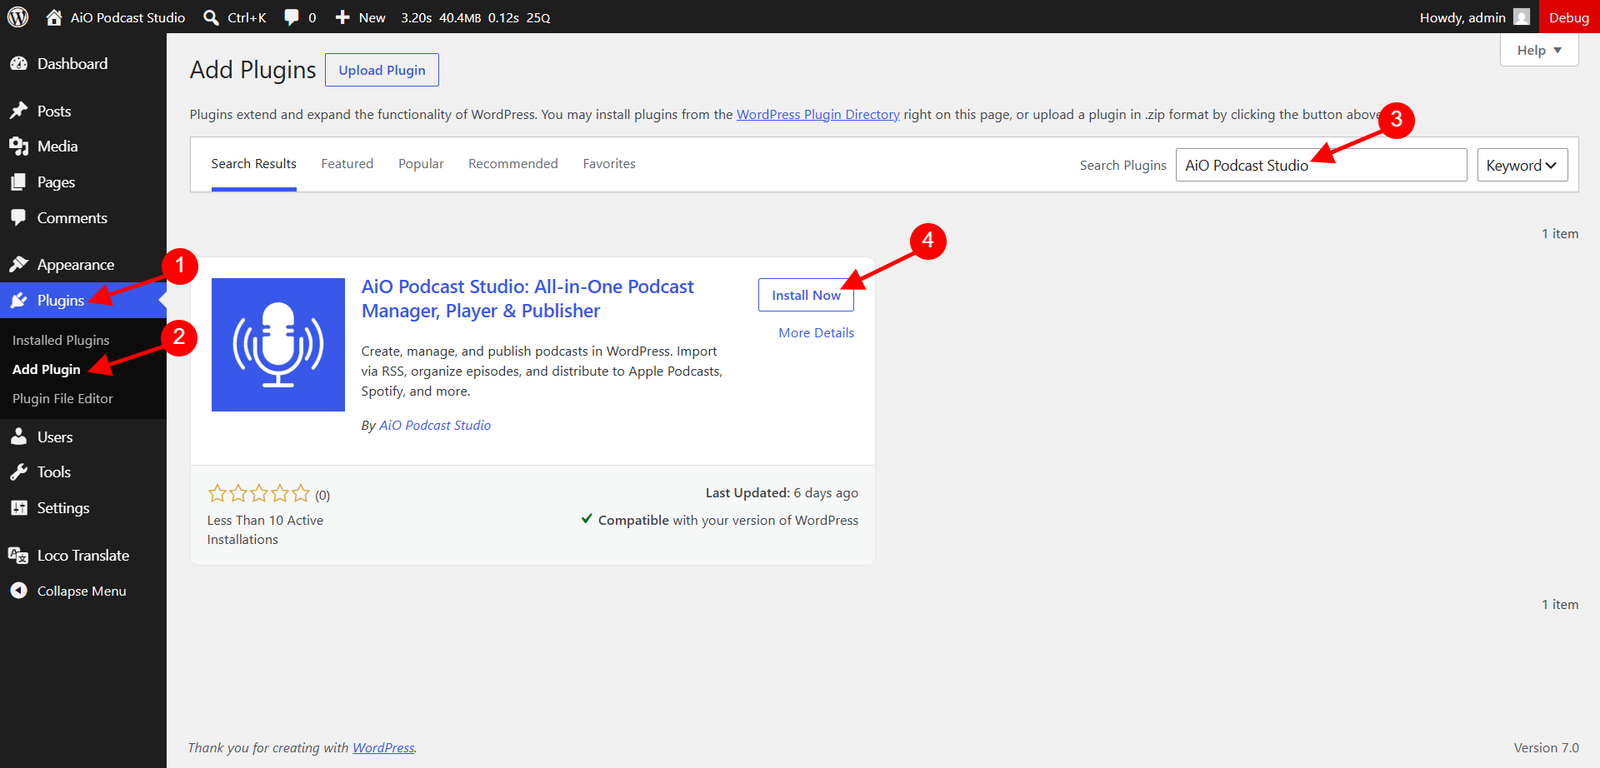
- Log in to your WordPress Admin Dashboard.
- In the left menu, go to Plugins → Add New.
- In the search bar, type AiO Podcast Studio.
- When the plugin appears, click Install Now.
- After installation finishes, click Activate.
What happens next?
Once activated, a new Podcasts menu will appear in your WordPress dashboard. This is where you will manage everything related to your podcasts.
Now that the plugin is ready, the next step is choosing whether to import an existing podcast or create a new one.
Step 2: Import an Existing Podcast via RSS
Already have a podcast on another platform? Use this step to bring it into WordPress automatically. If you are starting fresh, skip ahead to Step 3.
AiO Podcast Studio supports RSS imports from all major hosting platforms including Spotify, Buzzsprout, Libsyn, Podbean, and Anchor.
To import your existing podcast:
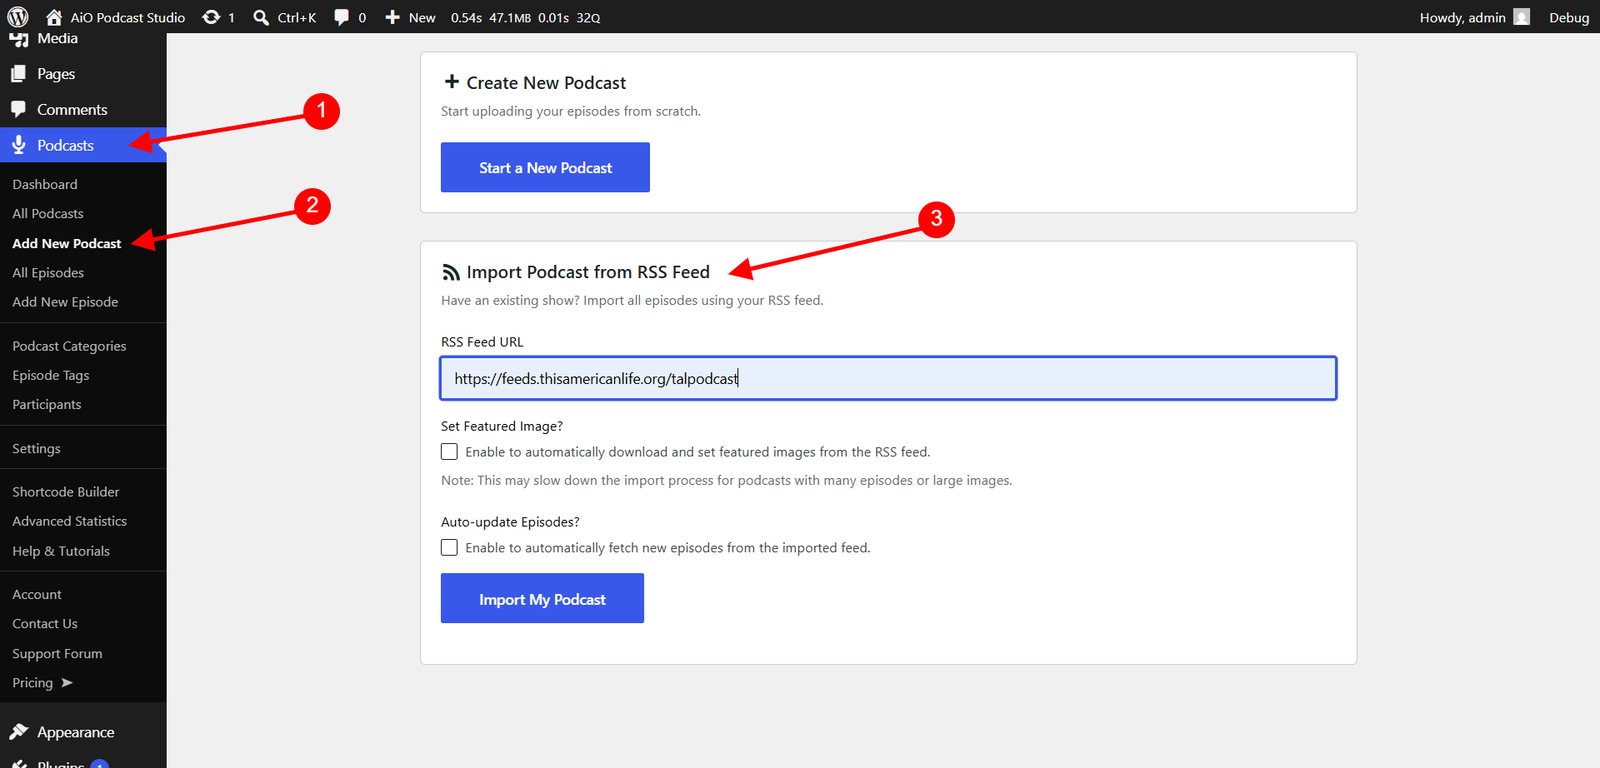
- Go to Podcasts → Add New Podcast.
- Scroll down to the Import Podcast from RSS Feed section.
- Paste your podcast RSS feed URL into the RSS Feed URL field.
Optional settings:
- Set Featured Image – Automatically imports artwork from your RSS feed and sets it as the podcast’s featured image.
- Auto-update Episodes – Automatically fetches newly published episodes in the future.
- Click Import My Podcast.
After the import completes:
Your imported content will automatically appear in:
- Podcasts → All Podcasts
- Podcasts → All Episodes
All imported podcasts and episodes can be edited at any time just like content you create manually.
Step 3: Create a New Podcast from Scratch
If you are starting your first podcast, this is where it begins.
To create a new podcast:
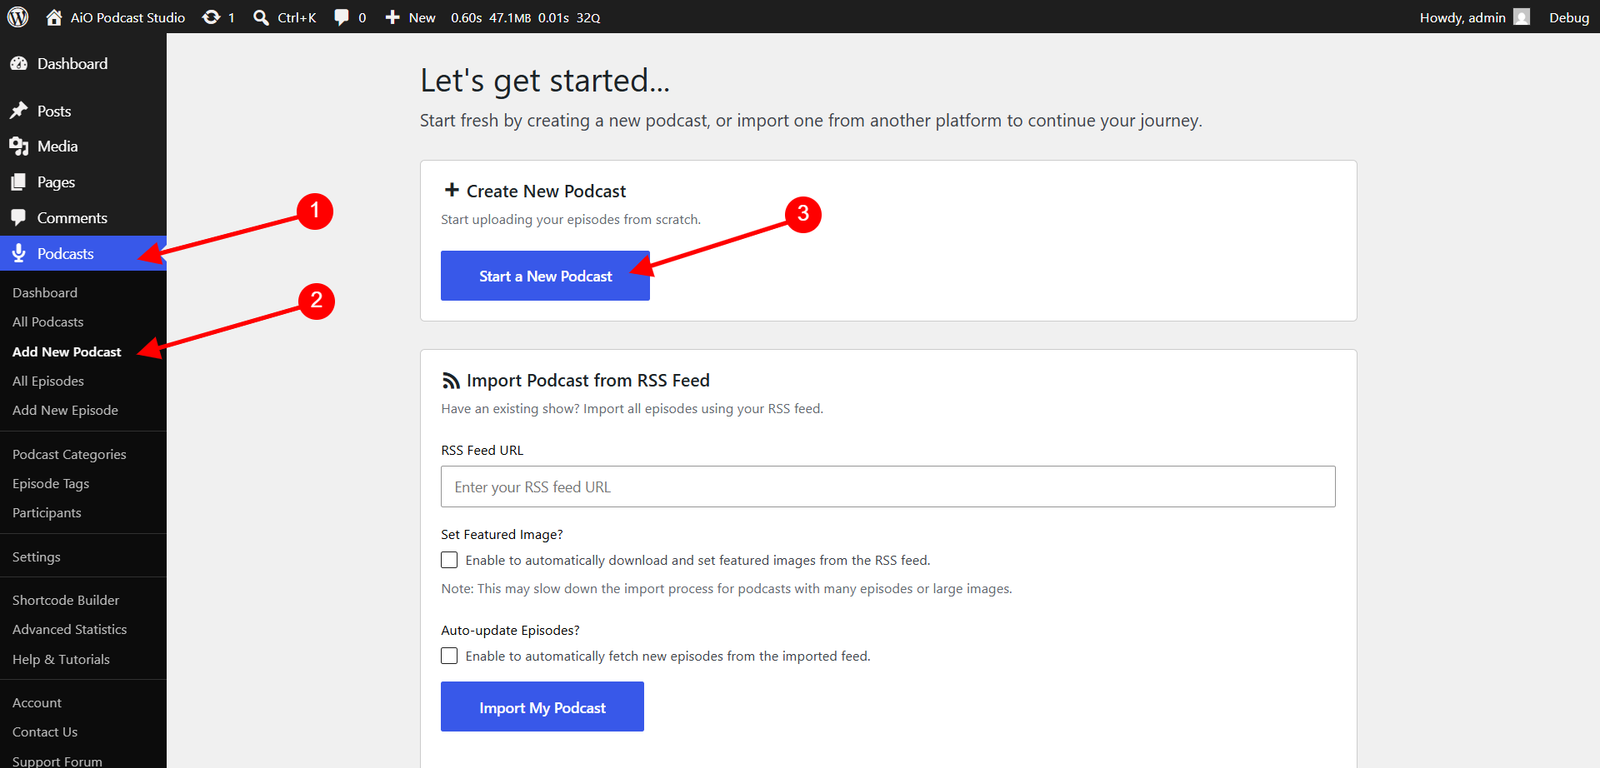
- Go to Podcasts → Add New Podcast.
- Scroll to the Create New Podcast section.
- Click Start a New Podcast.
The podcast setup screen will open.
Fill in your podcast details:
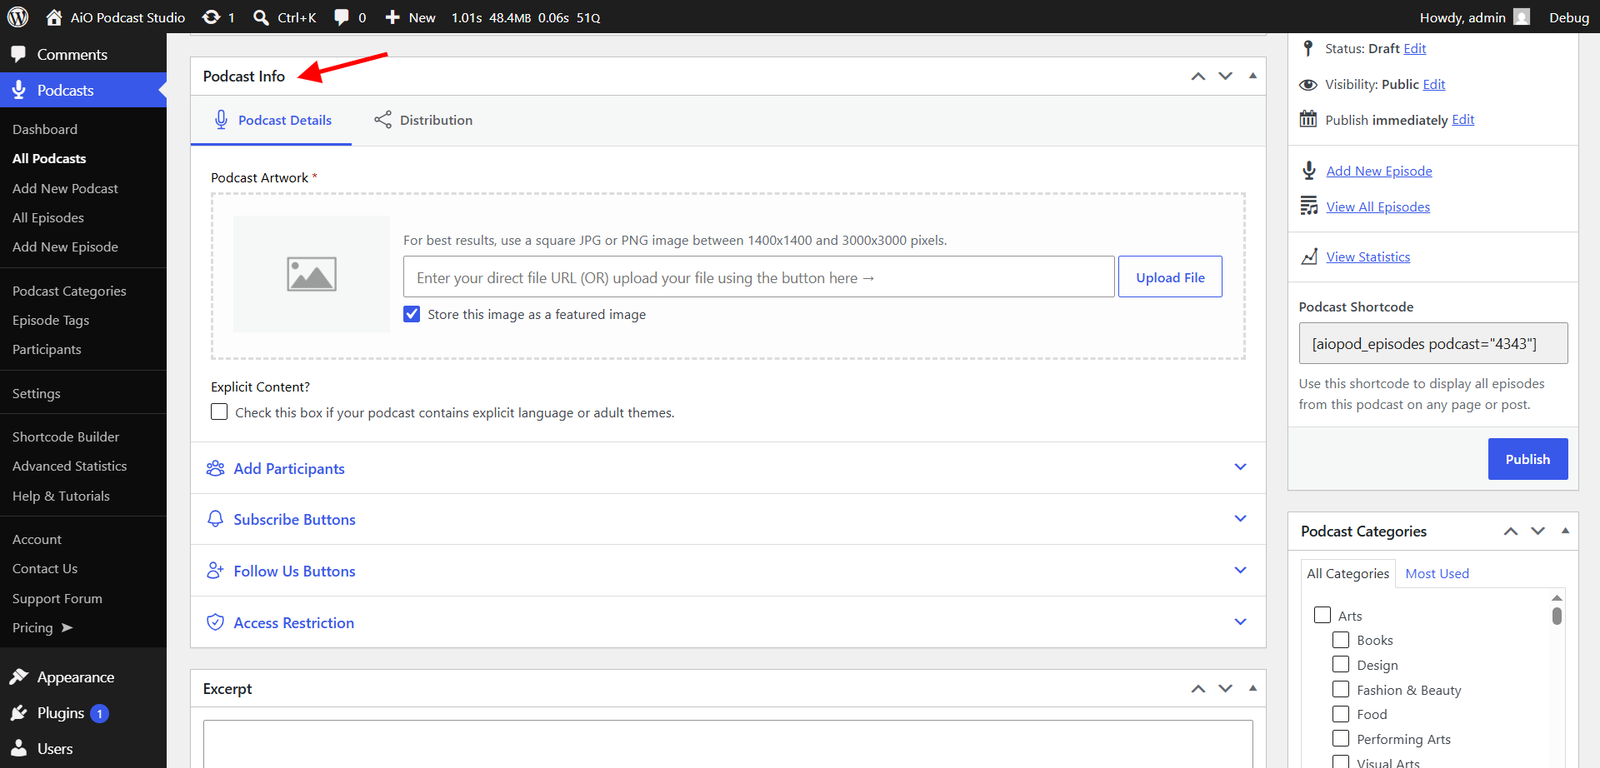
Complete as many fields as you can — these details help listeners discover and understand your show:
- Podcast title
- Description / summary
- Podcast categories
- Cover artwork
- Author information
- Language settings
- Participants / hosts
- Subscribe buttons and follow links
When finished, click Publish. Your podcast is now created.
Step 4: Add Episodes to Your Podcast
Now that your podcast exists, it’s time to publish episodes your audience can listen to.
To create a new episode:
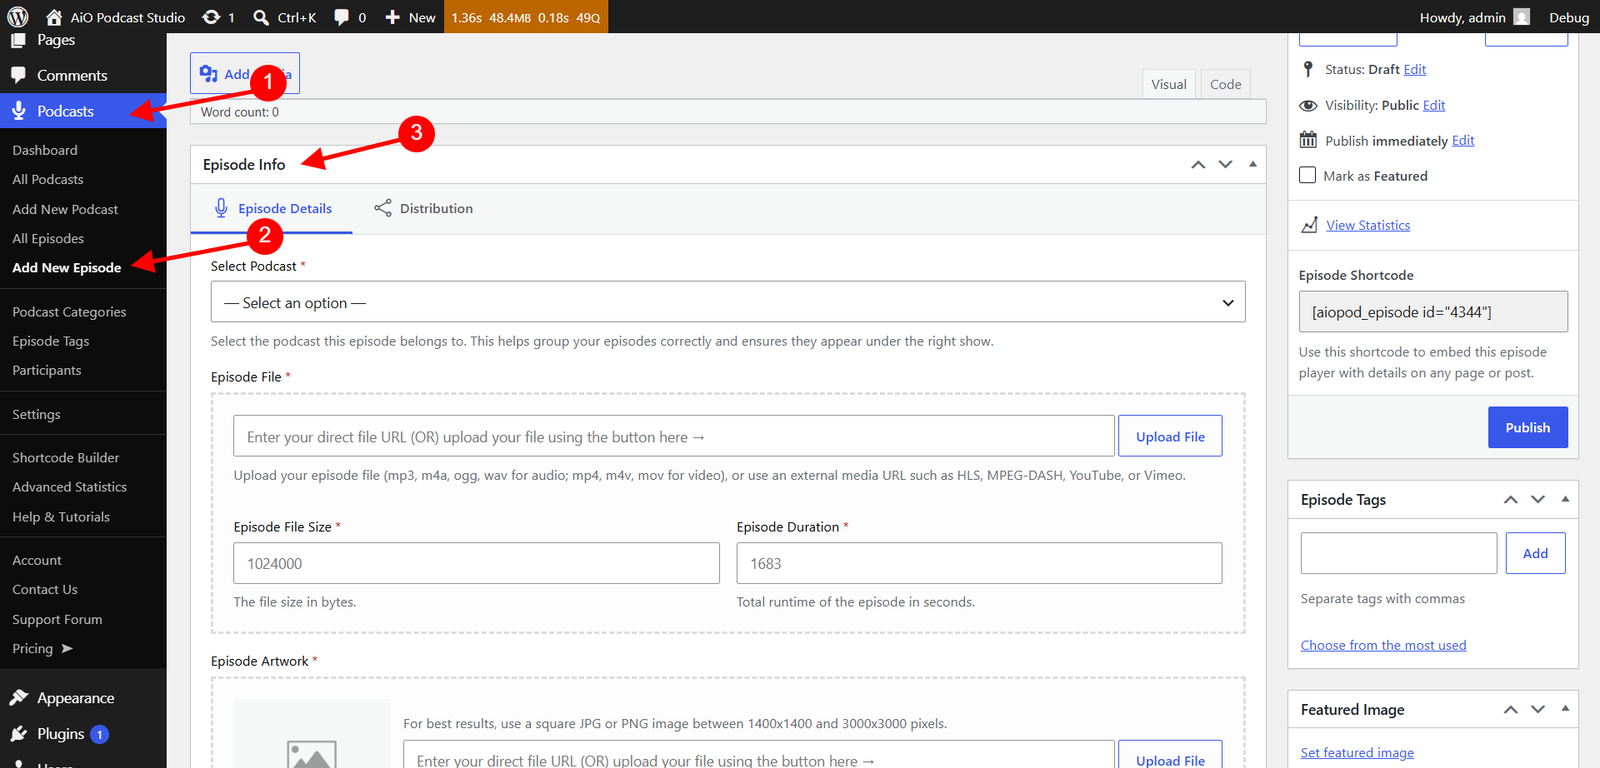
- Go to Podcasts → Add New Episode.
- The episode editor will open.
Required episode information:
- Episode title
- Episode description / show notes
- Select which podcast it belongs to
- Audio or video media file
- Episode artwork
- Episode tags
Additional episode details:
- Duration
- Season number
- Episode number
- Episode type (Full, Trailer, Bonus)
Optional advanced features:
- Participants / guest speakers
- Transcript text
- Chapters
- Access restrictions
When everything is ready, click Publish. Your episode is now live. Repeat this process for every new episode you create.
Step 5: Display Podcasts and Episodes on Your Website
Publishing episodes is only part of the process — you also need to display them on your website so visitors can listen. The easiest way is using the built-in Shortcode Builder.
Generate a shortcode to display podcast content:
Here is an example using the Episodes List shortcode:
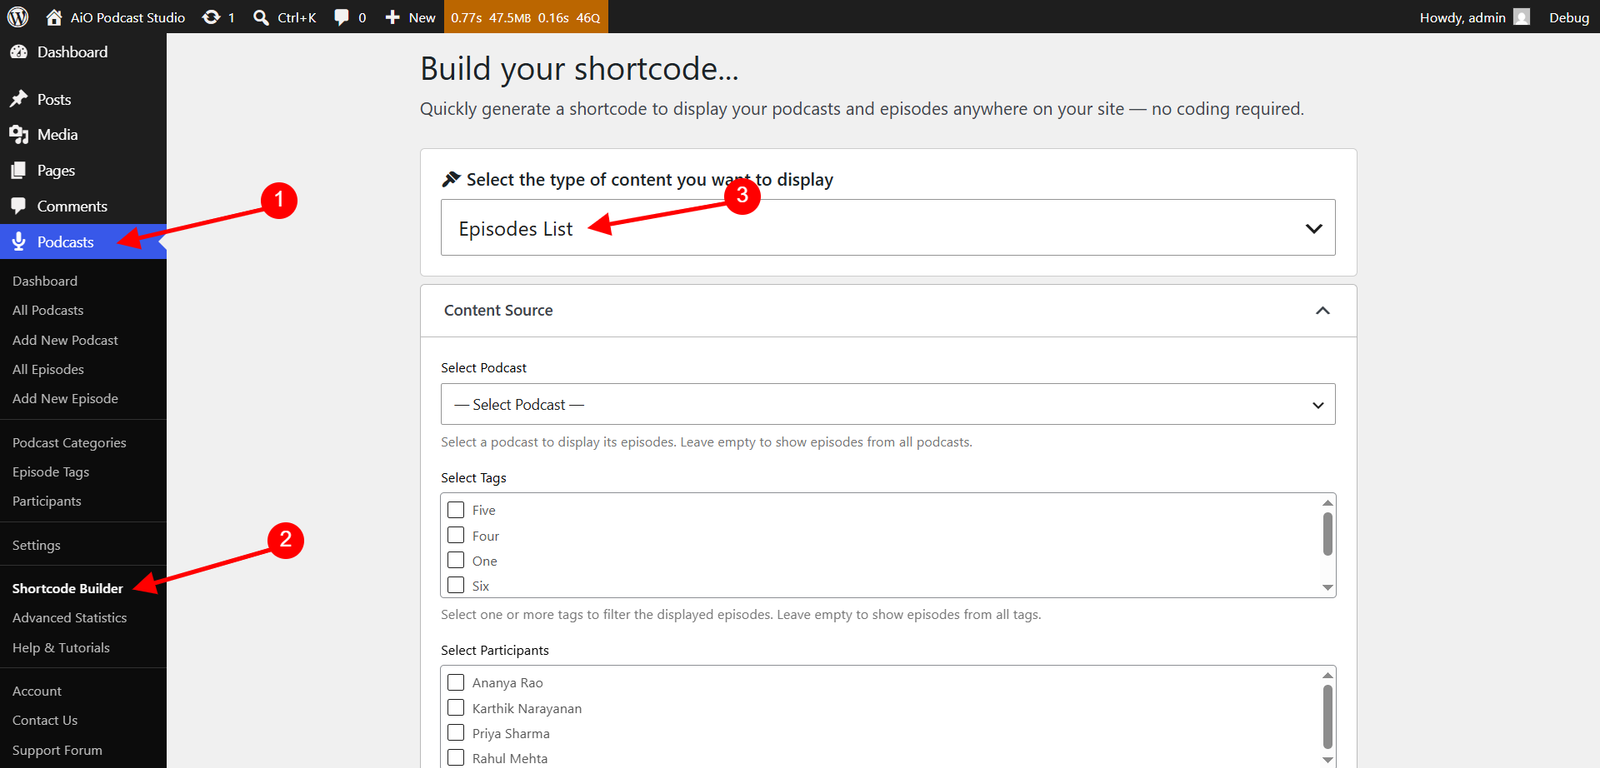
- Go to Podcasts → Shortcode Builder.
- Select Episodes List as the shortcode type.
- Optionally filter by Tags, Participants, or Episode type.
Customize display settings:
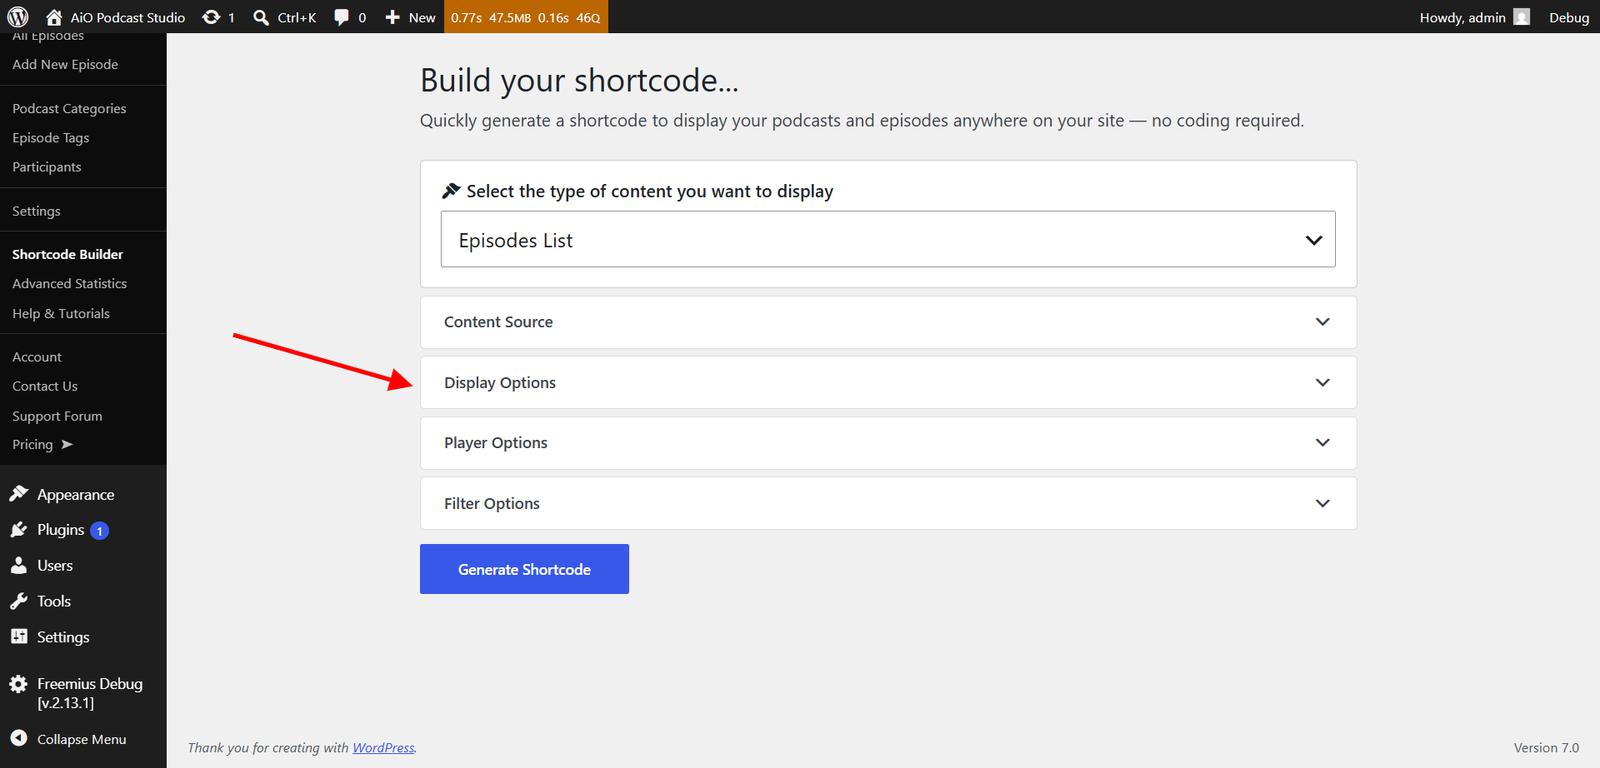
Adjust Display Options, Player Options, and Filter Options to match your layout needs.
- Click Generate Shortcode.
Add the shortcode to a page:
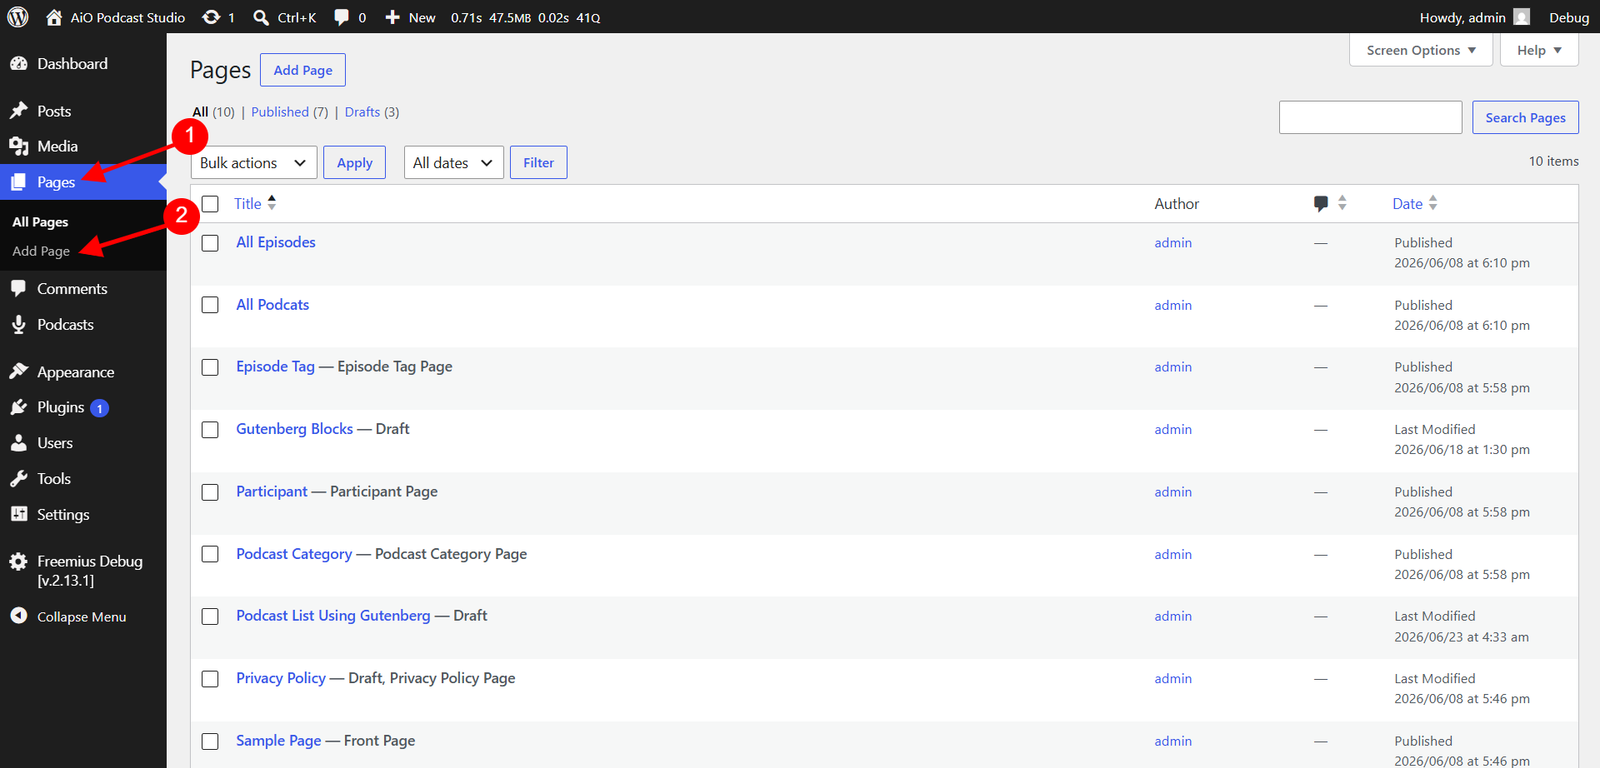
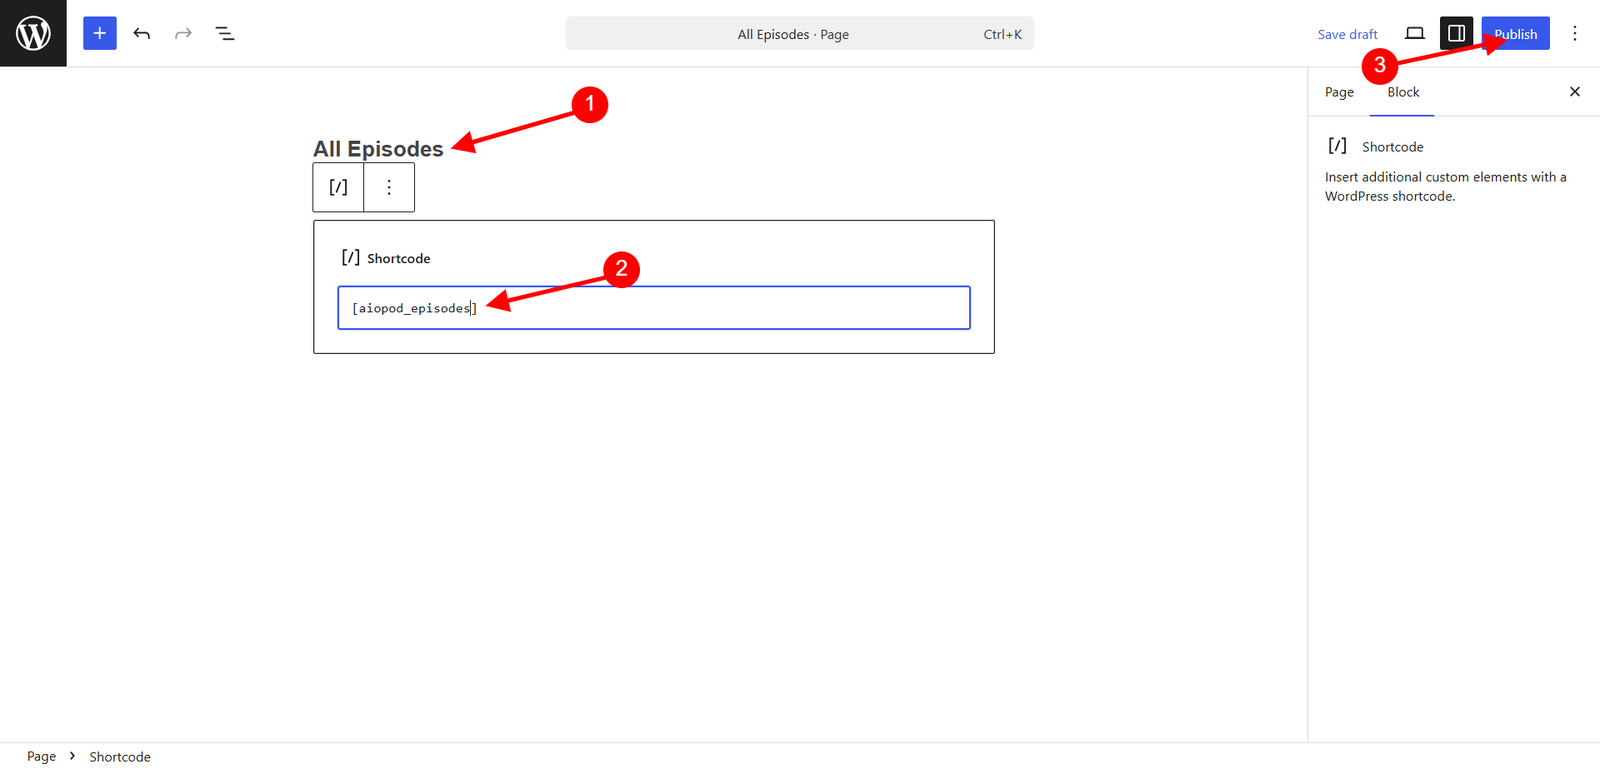
- Copy the generated shortcode.
- Open the page or post where you want episodes displayed.
- Add a Shortcode block in the WordPress editor.
- Paste the shortcode and save or publish the page.
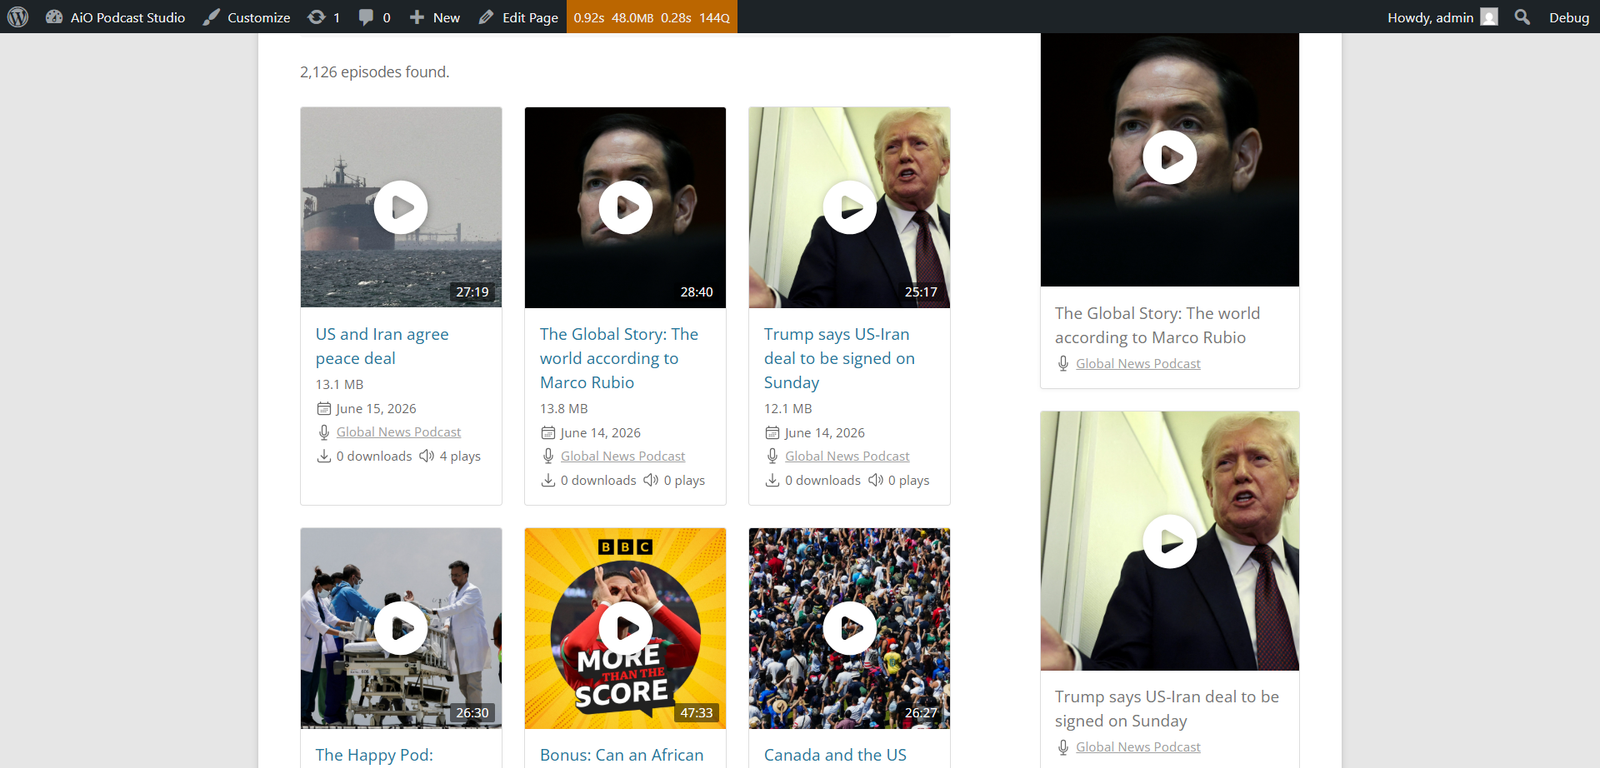
Your episodes will now appear on the front end of your website.
Other shortcode types available:
Besides Episodes List, the Shortcode Builder also generates shortcodes for:
- Podcasts List
- Podcast Categories
- Episode Tags
- Participants
Other ways to display podcast content:
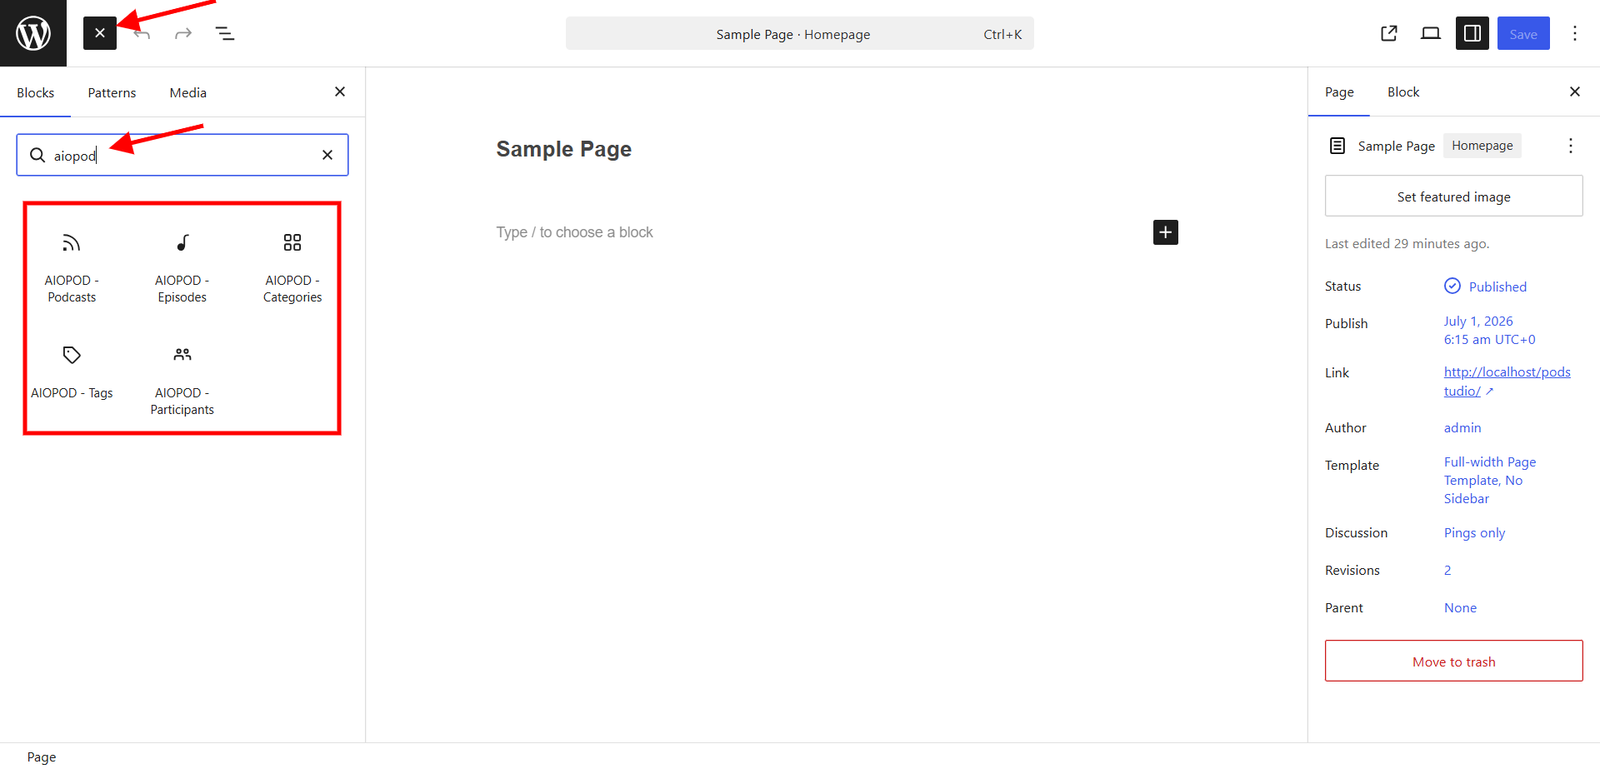
Gutenberg Blocks – Display podcasts and episodes directly inside the WordPress block editor with the same layout and style options as the Shortcode Builder.
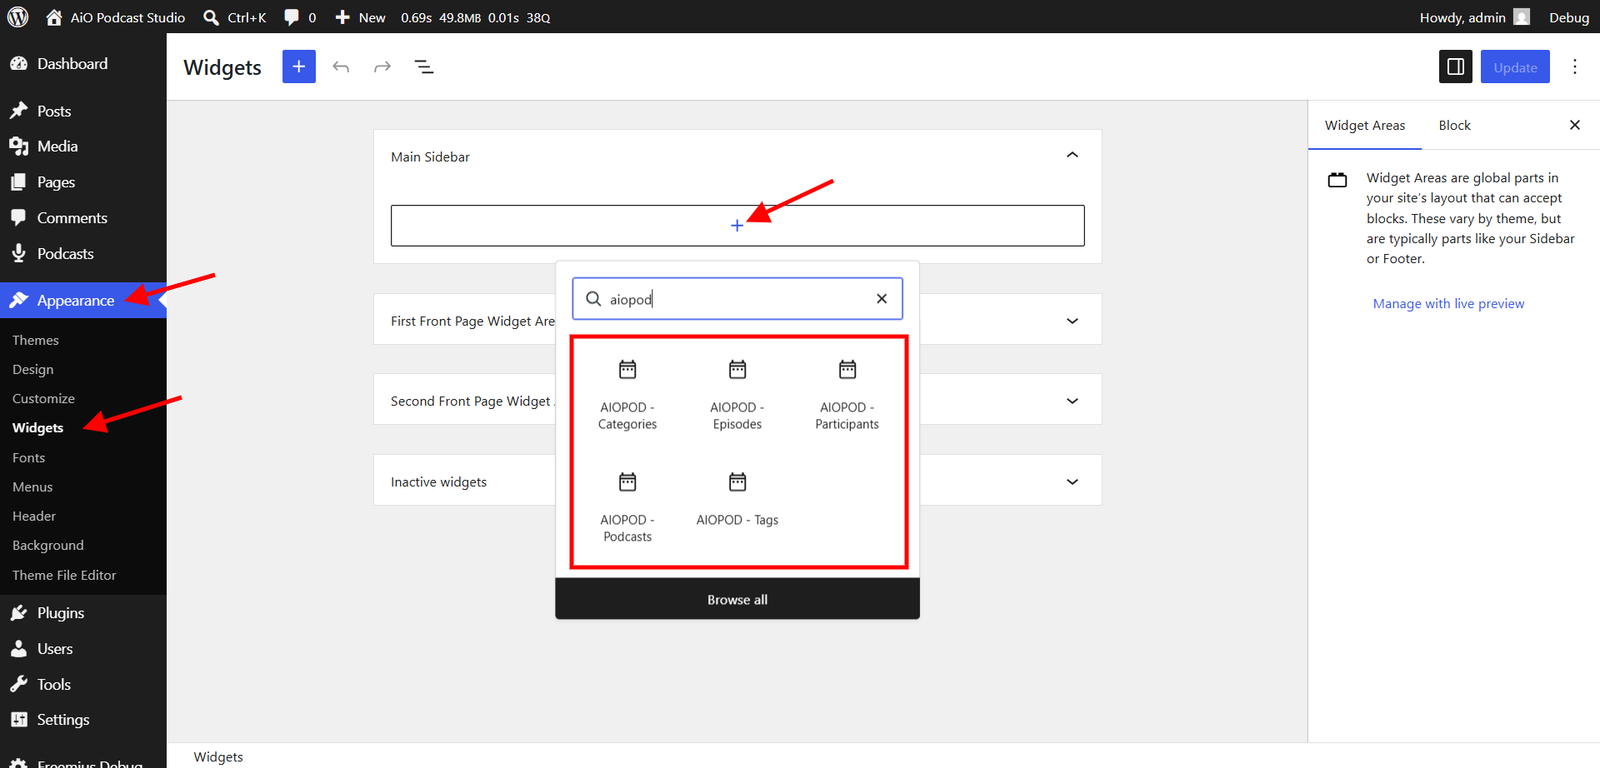
Widgets – Display podcasts and episodes in sidebars, footers, and other widget-ready areas, with the same flexible options as the Shortcode Builder.
Helpful References
Want to learn more? Continue with these tutorials:
- Using the Shortcode Builder, Gutenberg Blocks & Widgets
- How to Add and Manage Participants
- How to Translate AiO Podcast Studio
- How to Customize Plugin Front-End Layouts
You Are Ready to Launch
Your podcast website is now fully set up and ready for your audience.
Start growing your audience by publishing more episodes and customizing your podcast pages.